Friday, October 17, 2014

Apples in a Basket

3rd Grade: Apple Baskets

3rd Graders explored the works of Paul Cezanne (his many fruit still life paintings). We looked for value, organic shapes and overlapping. We talked about ways artists make apples in a basket look realistic. Overlapping the apples was a concept that most 3rd graders were familiar with, and I think this project was overall very successful. I did some examples of drawing apples in a basket using overlapping and not overlapping and students could instantly see the difference of which one was more realistic. I also drew some various examples of baskets and buckets on the white board, and hung up some posters with basket drawings on them for students to see. 
Students drew a basket with pencil on 12" x 18" black Riverside construction paper. (their paper could be vertical or horizontal. I did have to emphasize drawing the basket pretty big. Some students wanted to draw quite small. Students added apples to their basket. I also let students draw a tipped over basket with apples that had fallen out if they wished. They still had to show overlapping, though. Students glue traced over their pencil lines. Next art class, students filled in with soft pastel chalks. I demonstrated how to create values by tinting with white and how to add highlights. I also demonstrated added the sky first and grass last (so any grass blades would be over the sky and they would not have to color "blue sky" between grass blades). Basket was a free color choice. 

I just loved these fantastic pieces of art! I did laminate ALL of them. I took some pics of art displayed on the Dolphin Da Vinci board. Many teachers complimented these great works of art. Great job 3rd Grade!

Sunday, October 12, 2014

Silly Monsters

 Kinder: Silly Monsters

I read the book Go to Bed, Monster by Natasha Wing. Kinder students liked this humorous story about a monster that a girl draws that just does not want to go to bed. Finally, after drawing him a teddy bear and a bed, and reading him a story, the monster gets sleepy.  This was a really nice story to read in art class as the girl draws shapes first and the monster forms from the separate shapes and comes to life. The illustrations throughout the book are drawn as a child would draw them. 
Students also studied line-straight, curvy, zig zag and broken. We even added some loopty loops in there! Students also explored blue and yellow primary colors and discovered that green can be mixed and is called a secondary color. 
For this fun collage, students painted a 6" x 8" piece of sturdy cardboard. (These I cut down from the backing of construction paper packs). Students painted blue, then yellow, then mixed the green. We used the rhyme "blue and yellow make green, green is in the middle like a green bean; green is in the middle like a green string bean!" . Students liked this as you can imagine. Next class, students put a line onto 2 craft sticks (one large, one regular size). Students could choose any kind of line they had learned about thus far. Students then added color with oil pastels. I had pre-punched holes in the cardboard. Students put pipecleaners through the holes for "silly hair". We even made this into a line lesson. Students could have straight hair or curvy hair. Students glued google eyes and colored a cardboard nose with oil pastels. Students painted 2 old fashioned clothespins with red tempera for arms. These arms were glued on the next class. Students added additional line designs with oil pastels onto the monster face. 

These are really quite silly and very colorful!


Colorful Line Bugs

 1st Grade: Line Bugs

1st Graders studied different kinds of line-straight, curvy, zig zag, broken/dashed. I also decided to put some color theory into this project. We reviewed lines and primary/secondary colors on the whiteboard. Students then began this fun collage project. Students traced a circle template. Then, divided the circle into thirds (basically drawing a giant "Y" on their circle. Then, students painted red and yellow. Students created the orange by putting some yellow onto the red. For this age group, I told students to count 10 x as they brushed the paint back and forth on their circle to create the orange. Students did the same concept for the blue. They added blue and then "swiped" the brush to add the green. Purple was done last. 
The next class period, students cut and glued the circle to a giant white paper. (these were big..about 18" x 24" I think). Students then used red, blue and yellow markers to create bug legs. Students were encouraged to draw all the different kinds of lines they knew for this. Students also drew "lines" with glue and placed yarn legs onto their art. Students added google eyes and drew a mouth with black permanent marker. Students added glitter glue for sparkle on the bug body (using their finger to spread the glue). This was very fun for 1st grade! On the last day, students created leaves, stems and seeds with tissue paper and  green colored paper. I told students they could imagine their colorful line bug in the woods or jungle or even their own backyard. Students could decorate the leaves with oil pastels. This was a great project to kick off the new year. I think these students did a marvelous job!

Awesome Line Bugs 1st grade!


Guitars


2nd Grade: Music & Rhythm Guitars

2nd Graders studied line and how different lines can represent different moods and rhythms. Students identified slow and fast moving lines. Students watched a video of Louis Armstrong sing "It's a Wonderful World". Students came to the conclusion that that was a slow song and imagined themselves drawing "slow" lines to that song. Students also listened to a fast guitar song and did the same thing. Short zig zags were "fast". Long meandering lines that were curvy seemed to be slow. Students looked at some art that was abstract that depicted various jazz instruments. Students found the curvy, straight and jagged lines in the art. Students also looked at some photos of real guitars and learned the 3 main parts of a guitar-the body, neck and head. Guitars also have strings, a sound hole and tuning pegs. Electric guitars have volume controls and on/off switches.

Students then set to work on creating their own "musical" art. This was a collage art work for the most part. Students drew out a guitar body, cut and glued to a black colored 12" x 18" paper. I have found Riverside brand construction paper to be the best black paper for the value. It keeps it's deep  color and is thick. Students glued down a guitar neck (I had these pre-cut) and cut and glued a shape for the head. Students then chose guitar strings (pre-cut). Students added sound holes and other guitar elements piece by piece. Students also created a minimum of 3 background shapes to be drawn, cut and glued. These could be a variety of lines and shapes to add to the rhythm of the art. Students created a border. Lastly, students spread various colors of glitter glue on their guitar collage art. I found that students dipping a finger into the glue and spreading was the best way to put the glue on the art.

Great job 2nd Grade!


Tuesday, October 7, 2014

Magic Carpets

Kinder: Magic Carpets

Kinder students learned about Dhurri rugs from India. These are handmade rugs that have been made in India for hundreds of years. They have many lovely designs on them. Kinder has been learning about many different kinds of lines, including straight, curvy, zig zag, dot-dot and broken/dashed line. 

For this art work, kinder students drew different lines on their "carpet" with cool colors. Next step was painting over their carpet with warm colors with "slide and glide" watercolor painting. I have found white cardstock good when watercolor paint needs to blend together, so that is what students used for this.  Students painted stripes all around the edge of their carpets in gold and silver tempera paint. Lastly, students added green and blue yarn to the corners (holes were pre-punched in the cardstock). This was simply a "pull the ends of the yarn through the loop" attachment. Yarn was the trickiest part but I had kinder students help each other on this and I did a step-by-step on it. Some students ended up typing yarn, but that looked fine also.

Hokusai Art

4th:
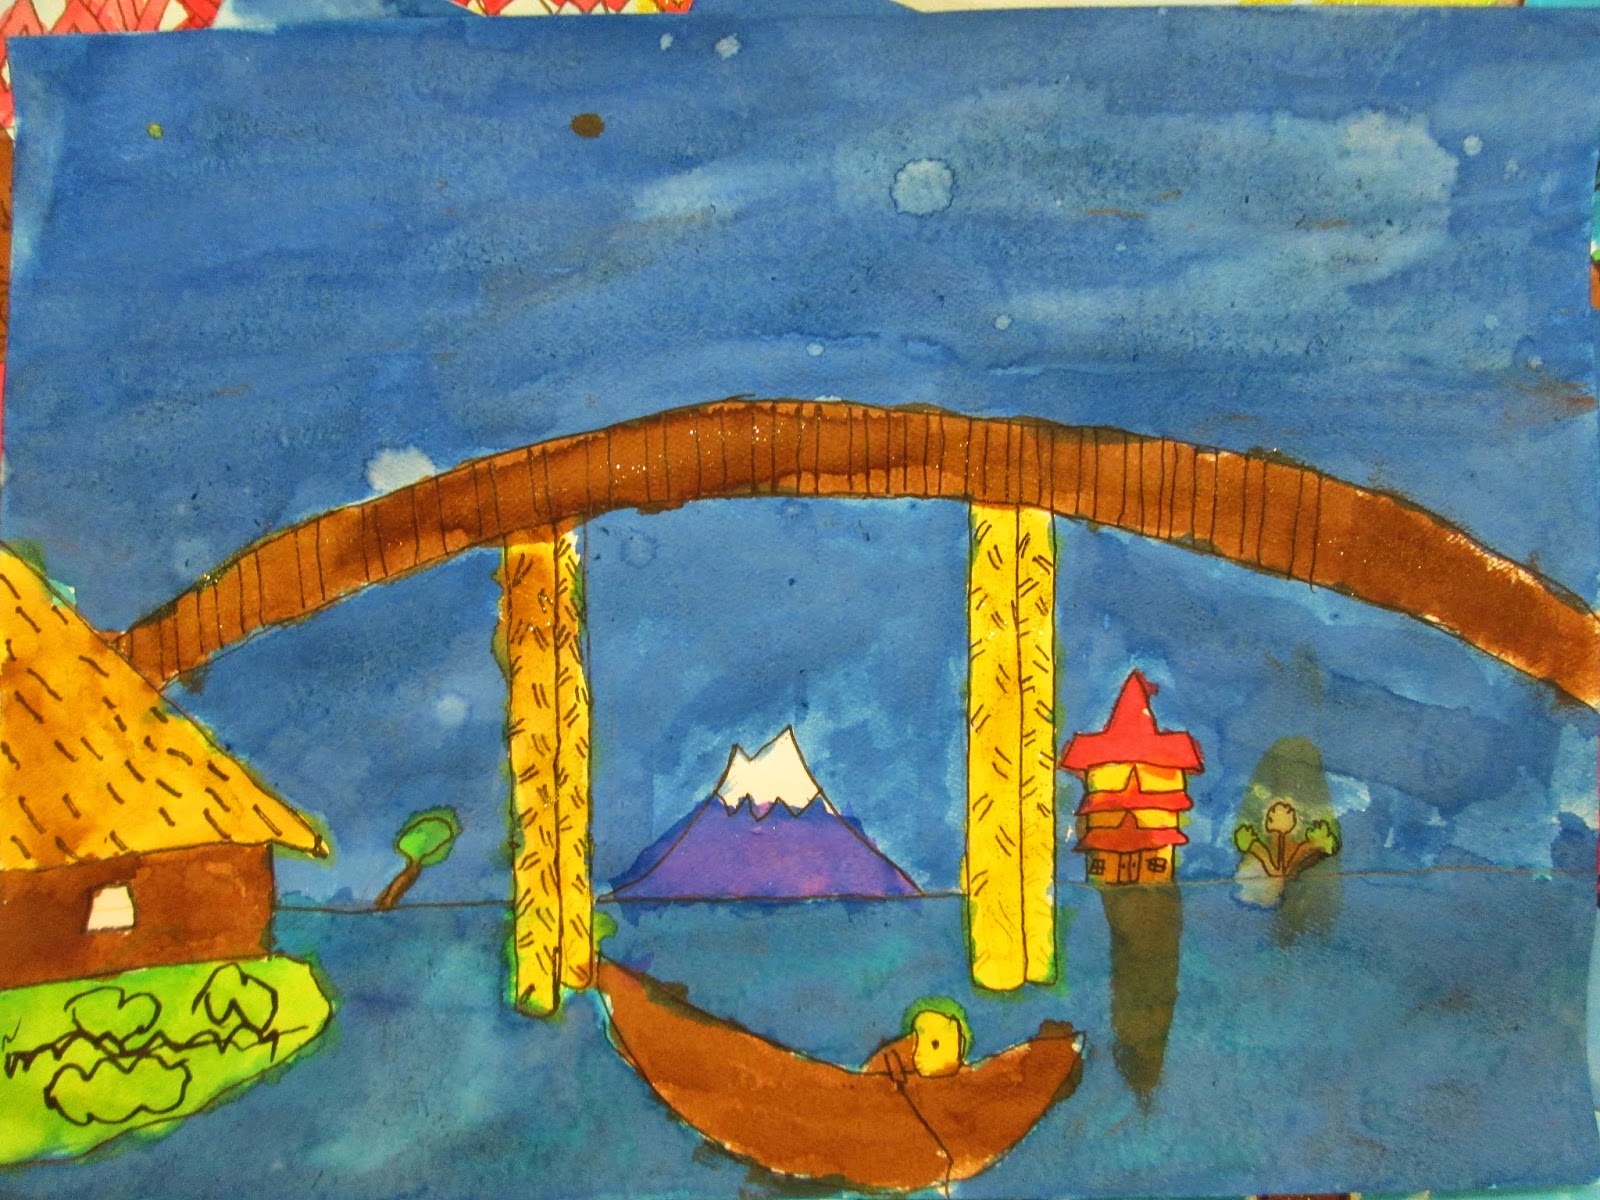
Hokusai: Under the Mannen Bridge

4th graders studied Hokusai and all his awesome art from centuries ago. Hokusai is most known for his 36 Views of Mt. Fuji series. Mt. Fuji is now a dormant volcano. Students are always fascinated when I mention a volcano in art class, whether dormant or active! When Hokusai was creating his art, there was a boom in domestic travel. Many people in Japan were walking, boating, riding a horse all across Japan. There were many different kinds of bridges. Students explored various art works made by Hokusai and noticed the many ways Mt. Fuji was depicted (up close and far away, in sunset and daylight). Students noticed zig zag bridges, and suspended bridges (with seemingly no handrails), foot bridges, and arched bridges. 
The artwork my art students created was based on Hokusai's famous "Under the Mannen Bridge" picture. With Mt. Fuji being what is seen under the Mannen bridge. We changed it up a bit of course by giving some artistic freedoms with this. I let students depict a number of things under the bridge, including, Japanese style houses, palaces, trees, and of course mountains. Mt. Fuji could be erupting or not. Students could also choose the bridge style they liked the best-straight, arched or even zig zag. Students created a line design on their bridges for interest. For the houses (the cropped ones on the left and right sides of the paper), students used house templates to trace around. Students also used boat templates. I found these to be very helpful. 
Students traced everything w/black sharpie (a mix of fine and extra fine pens). Next class, they painted with liquid watercolor the sky and water. I gave students 3 different kinds of blue (Blue, Turquise blue and Blue Green). I do love using liquid watercolors as students have so many options for blue and for this kind of project, it really makes a difference.  NEXT class after that, they painted everything else. This was important so the blues in the sky and water didn't blend with all the other elements. For the most part, students had free color choice. I did encourage lots of warm colors at this point to give some contrast. Lastly, students added gold glitter tempera paint to the bridge for an added sparkle effect. It seems like this has been one of the longest 4th grade projects I've ever done..but I think the results are well work it! In all, 4 class periods (each 1 hour long) to complete.